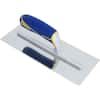
QEP 3/16" x 5/32" V-Notch Trowel
The standard notch for subway tile on a wall.
Affiliate link placeholder · Home Depot prices as of 2026-10-14 · Amazon prices shown at checkoutA backsplash is one of the most-searched DIY upgrades, and one of the biggest visual returns per square foot. Here's the kit and method for clean, level lines.
Tile is priced per case as listed by Home Depot. Your total depends on square footage plus 10–15% extra for cuts.
Tick items off as you shop. Ratings and review counts were checked on 2026-10-14. Home Depot prices are as of 2026-10-14. Amazon shows its price at checkout.
The standard notch for subway tile on a wall.
Affiliate link placeholder · Home Depot prices as of 2026-10-14 · Amazon prices shown at checkout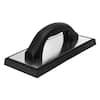
A compact float suits narrow backsplash runs.
Affiliate link placeholder · Home Depot prices as of 2026-10-14 · Amazon prices shown at checkout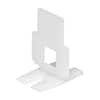
Keeps edges flush and joints even. The Part B wedges are sold separately.
Affiliate link placeholder · Home Depot prices as of 2026-10-14 · Amazon prices shown at checkout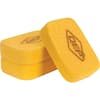
Rounded corners for grout cleanup.
Affiliate link placeholder · Home Depot prices as of 2026-10-14 · Amazon prices shown at checkout
Classic beveled subway. Sold by the case (10 sq ft).
Affiliate link placeholder · Home Depot prices as of 2026-10-14 · Amazon prices shown at checkout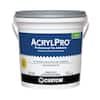
Premixed mastic for ceramic tile on dry walls. No mixing.
Affiliate link placeholder · Home Depot prices as of 2026-10-14 · Amazon prices shown at checkout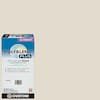
Unsanded for tight subway joints. Comes in many colors.
Affiliate link placeholder · Home Depot prices as of 2026-10-14 · Amazon prices shown at checkout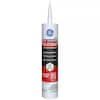
For the countertop and cabinet joints. Never grout these.
Affiliate link placeholder · Home Depot prices as of 2026-10-14 · Amazon prices shown at checkoutTurn off the breaker, remove outlet covers, clean and degrease the wall, and patch dings.
Snap a level line one tile up from the counter and dry-lay a row to center the pattern and avoid slivers.
Comb mastic with the V-notch trowel in 2–3 sq ft sections, ridges in one direction.
Press tiles in with a slight twist. Use spacers or clips and stagger each row by half a tile.
Mark and cut notches, and use box extenders if the tile pushes the outlets back.
After 24 hours, pull the clips and float the grout diagonally.
Sponge to shape the joints, buff off the haze, then caulk the counter and cabinet edges.
Our picks of the clearest tutorials. Credit and copyright belong to the creators.
Layout, setting, cuts and grout start to finish.
Visit channel ↗A faster mat-adhesive method, plus grouting.
Visit channel ↗Premixed mastic is fine for ceramic subway tile on dry drywall. Use modified thinset for glass, stone, large tile, or a wet wall.
Not normally. Clean, sound drywall is fine behind a kitchen backsplash.
Usually at the underside of the upper cabinets, or a clean end line such as the edge of the counter or the cabinet sides.
Seasonal maintenance, the tools worth buying, and a new job guide each month.